Tutorials
docx→JATS→EPUB
By following this tutorial you will be able to set up a transpect conversion project. You will encounter the main concepts:
-
transpect is a configuration management system for XProc/XSLT/validation pipelines with a focus on publishing workflows.
-
transpect provides modules for conversion between XML-based formats such as docx and EPUB, and between XML vocabularies.
-
The Schematron/RelaxNG/custom validation results will be consolidated into an HTML rendering of the input.
-
transpect projects typically reside in revision control repositories, attaching the necessary modules and even the runtime (Calabash XProc processor) as svn externals or git submodules
Prerequisites: Intermediate knowledge of revision control systems, XProc, and XSLT.
transpect offers some ready-to-run pipelines such as ➼ docx2tex or ➼ epubcheck-transpect, but most projects require configuration. transpect is not a tool, it’s a framework that has its own modules and methodologies. Someone needs to configure them, operate them, and to make sure that once-configured pipelines continue to yield consistent results.
This tutorial focuses on the configuration part.
Creating a Repository
A transpect project consists of a specification which modules to use (and in which revision), project-specific adaptations, and the modules. The project itself resides in a version control repository (we are using Git and Subversion (SVN), others will probably work, too). There are at least three ways of setting up a transpect project:
-
Git project with Git submodules
-
SVN project with SVN externals (GitHub provides sufficient SVN support to make this feasible, even if the modules reside in Git repositories)
-
Git, SVN (or probably also Mercurial) project with the modules as Git or SVN externals, using ➼ ext
We will focus on the first approach, although git submodules are quite a beast. For people who don’t use SVN on a regular basis it’s the best choice though.
Let’s start creating a repository on GitHub. We call it ➼ docx2jats-demo and clone its ➼ initial commit 99ce82f to local:
git clone https://github.com/transpect/docx2jats-demo.git --recursive
You wouldn’t need --recursive on your first checkout, but for those who intend
to clone the final project this is helpful already.
Adding Submodules
We’ll identify the modules that we need (primarily by their name, such as ➼ docx2hub, ➼ hub2jats, ➼ jats2html or ➼ epubtools). One of the submodules is the XProc processor. In principle, we could rely on an already-installed XML Calabash. However, we need some Calabash extensions, a more recent Saxon version than is bundled with Calabash, and compatibility assurance. Therefore, we created our own Calabash distribution, usually based on the most recent release, and we add this as a submodule to every project.
git submodule add https://github.com/transpect/calabash-frontend.git calabash
The calabash-frontend is special in that it includes other submodules. These won’t be checked
out by default. Therefore you should initialize them recursively:
git submodule update --init --recursive
(You can postpone this statement until you have specified all submodules.)
If you are using SVN externals, you’ll have to specify five externals:
https://github.com/transpect/calabash-frontend/trunk@38 calabash
https://github.com/transpect/calabash-distro/trunk@9 calabash/distro
https://github.com/transpect/rng-extension/trunk@10 calabash/extensions/transpect/rng-extension
https://github.com/transpect/unzip-extension/trunk@2 calabash/extensions/transpect/unzip-extension
https://github.com/transpect/image-props-extension/trunk@4 calabash/extensions/transpect/image-props-extension
Note that it is recommended to attach SVN externals with a fixed revision number, at least in production. Git submodules are fixed to a certain commit by default.
Let’s continue checking out some externals. We are probably going to validate the intermediate ➼ Hub XML in our docx→Hub→JATS→EPUB pipeline. This RNG schema includes the ➼ CSSa schema as a submodule.
git submodule add https://github.com/le-tex/Hub.git schema/hub
git submodule update --init --recursive
In an SVN project, you’d add two externals for this:
https://github.com/le-tex/Hub/trunk schema/Hub
https://github.com/le-tex/CSSa/trunk schema/Hub/css
Since it is not relevant for production and since newer releases of the schemas should be backward compatible, it is relatively safe to omit the fixed revision here.
git submodule add https://github.com/transpect/schema-jats schema/jats
git submodule add https://github.com/transpect/schema-html schema/html
git submodule add https://github.com/transpect/docx2hub
git submodule add https://github.com/transpect/evolve-hub.git
git submodule add https://github.com/transpect/hub2html.git
git submodule add https://github.com/transpect/hub2bits.git hub2jats
git submodule add https://github.com/transpect/jats2html.git
git submodule add https://github.com/transpect/cascade.git
git submodule add https://github.com/transpect/htmlreports.git
git submodule add https://github.com/transpect/schematron.git
git submodule add https://github.com/transpect/epubtools.git
git submodule add https://github.com/transpect/epubcheck-idpf.git
git submodule add https://github.com/transpect/xslt-util.git
git submodule add https://github.com/transpect/xproc-util.git
You’ll find individual descriptions of the modules in the ➼ Modules section.
Some of the modules you’ll need in almost every transpect project, some are vocabulary-specific (the ones that contain “jats” or “bits”) or input/output format specific (the ones that contain “docx”, “idml”, or “epub”).
Commit the changes and push it to the upstream repository:
git commit -m "add submodules"
git push
This is the repository after commit ➼ 2445f08.
If you have commit permissions to ➼ transpect.io on github or if you have attached Git submodules from your own repositories, be aware that everything that you change to the checked out submodules will probably be lost, due to the unwieldy nature of Git submodules (➼ “git submodules detached head”). If you want to edit them, do a
git submodule foreach git pull origin master
on the top level directory of the transpect project. Then you can individually add, commit, and push changes to the submodules from their own directories, until you finally add, commit, and push the new commits from the top-level directory.
XML Catalog
Each transpect module is known by a canonical URI (example: http:transpect.io/docx2hub/)
that may be used for importing their XSLT, XProc, images, or even for referring to
fonts in CSS files. The
mapping to actual files will be performed by a catalog resolver that needs to be configured
by an XML Catalog.
The Calabash frontend script,
➼ calabash.sh or
➼ calabash.bat, will
read a catalog ➼ ../xmlcatalog/catalog.xml by default. The catalog that you are going to create
will contain mostly nextCatalog that refer to the modules’ XML catalogs, at their relative locations
in your project. In addition, you declare
<rewriteURI uriStartString="http://this.transpect.io/" rewritePrefix="../"/> to point to
your project’s base directory. This is necessary for the configuration cascade that
we’ll encounter later. By convention,
all project-specific adaptations reside below http://this.transpect.io/a9s/.
mkdir xmlcatalog
 # (edit xmlcatalog/catalog.xml)
 git add xmlcatalog
We’ll get back to the last instruction in the catalog later
(<nextCatalog catalog="content-repo.catalog.xml"/>).
If you are an ➼ oXygen user, now is a good time to create
a .xpr (oXygen project) file. In this file, you tell oXygen to use
${pdu}/calabash/xmlcatalog/catalog.xml as XML catalog.
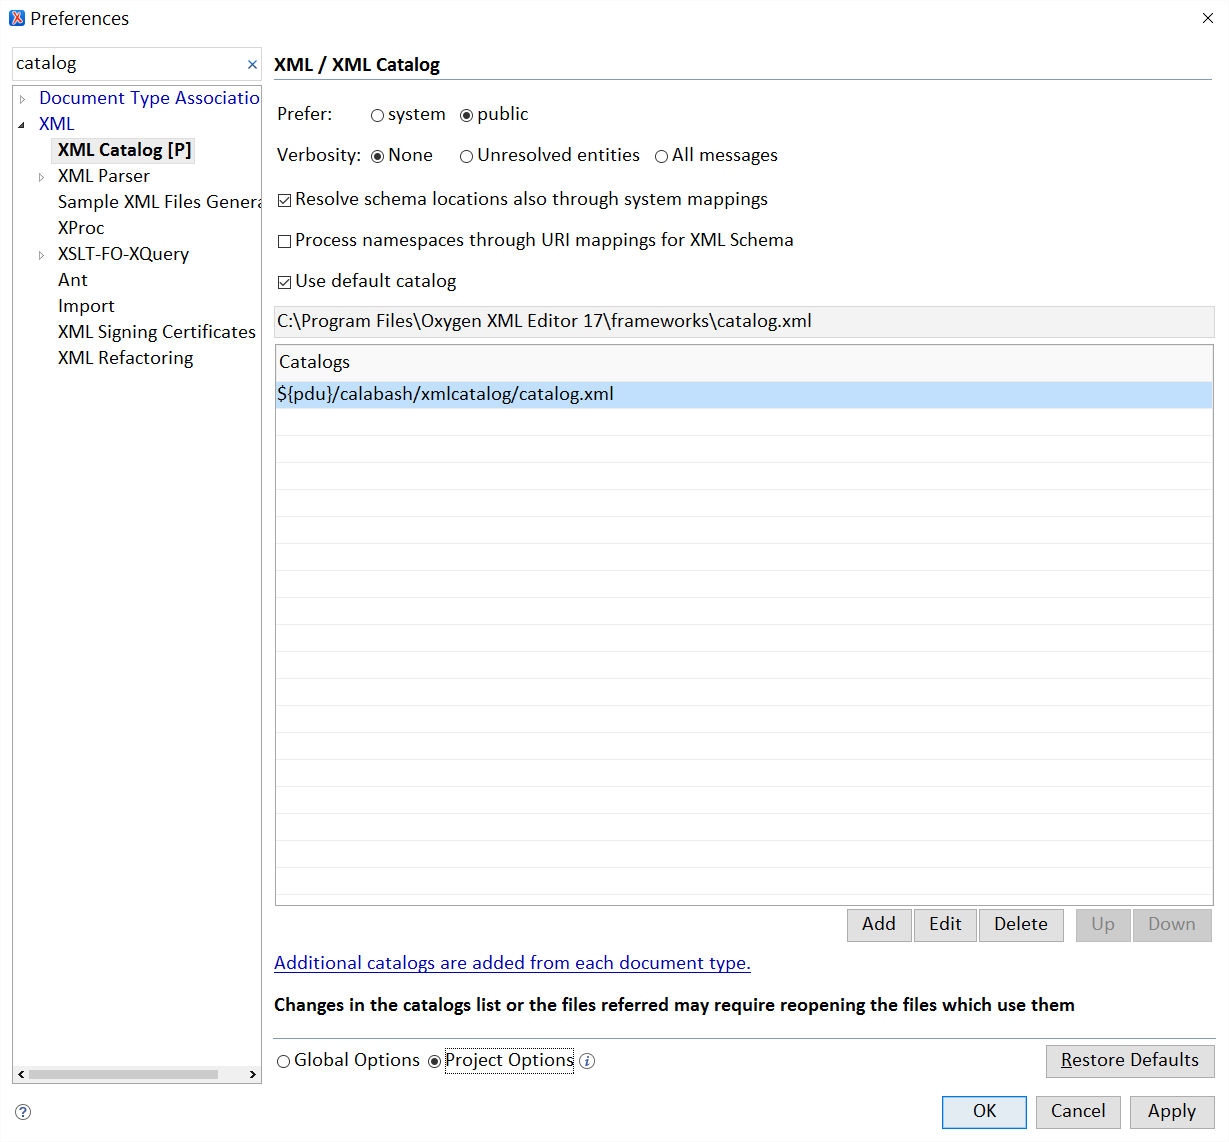
This will make oXygen use your project’s catalog by means of a nextCatalog instruction, in
the same way as Calabash uses your catalog. This will be helpful later because oXygen
will be able to follow the
canonical URIs.
While you are at it, you should “Enable Master Files Support” for this oXygen project
and add
docx2hub/xsl/main.xsl and evolve-hub/xsl/evolve-hub.xsl. We may need to
add more files as we go. They are needed by oXygen in order to resolve variable/function/key/template
declarations
from other files than the currently edited or its imports. By doing so, you’ll benefit
from oXygen’s XSLT checking
capabilities that go far beyond syntax checks.
git add docx2jats-demo.xpr
git commit -m "add XML catalog, oXygen project"
git push
You may try the correct catalog resolution and oXygen configuration by Ctrl-clicking
on
http://this.transpect.io/ in the catalog. It should open the project’s base directory.
With an update to a submodule that happened in the meantime, the repo at this stage looks like this: ➼ eabd9b6
Getting Sample Input
Our friends at ➼ University of Leipzig Sports Medicine produce and publish an open access journal from Word files. Their desire to upload the articles to ➼ PMC made them ask us to provide a converter. Because our test system relies on SVN front-end repos, we were unable to use it as a GitHub-based demo project. But we can use their content. You can check it out from our ➼ SVN server:
mkdir ../content
svn co https://subversion.le-tex.de/common/transpect-demo/content/ulsp/ ../content/ulsp
or, for the time being, you can just save one of the
➼ .docx
files anywhere you want. Please be aware though
that steps that we’ll introduce later (zipping the output and the images for PMC, …)
rely on the
.docx files residing in a docx/ directory. Also, for making use of the configuration
cascade that lets you – in principle – override settings per article, the content
has to be stored according to a certain
directory structure.
A First Pipeline
By convention, the pipelines that are meant to be invoked directly (as opposed to
pipelines that implement
the innards of a macroscopic step such as the ominous evolve-hub) reside in the directory
a9s/common/xpl. This is absolutely not necessary; they may reside anywhere within the project.
Let’s create a9s/common/xpl/docx2jats.xpl and insert a basic pipeline: docx → flat Hub XML → JATS
The commit is ➼ 0e289b5,
and the ➼ pipeline
looks like this. You’ll notice the p:import by canonical URI statements and the three essential
steps, docx2hub:convert, hub:evolve-hub, and jats:hub2bits
(the odd naming is because the step will produce ➼ BITS
books instead of JATS articles if fed with a /dbk:book document).
Invoke the transformation with the following statement on the command line (swapping
.sh
with .bat and probably also / with \ on Windows machines
without ➼ Cygwin):
calabash/calabash.sh a9s/common/xpl/docx2jats.xpl file=../content/ulsp/CSMI/CSMI_2014_701/docx/CSMI_2014_701.docx
You will see some garbage
that faintly resembles JATS, but with all kinds of css: attributes
and a dark-matter element instead of body or back. This
is because the converter needs to know how to interpret the paragraph and character
style names in the Word file.
The main part of this transformation is done in evolve-hub that is a library for nesting list
items according to indentation, hierarchizing sections whose names match ceertain
regexes, grouping figures and
tables with their captions, etc. evolve-hub is a toolbox (or a beast, according to other people)
from which to configure multi-pass XSLT pipelines that up-convert
➼ Hub XML, the flat DocBook derivative, to a more reasonable
DocBook that may then be converted “sideways,” with significantly less XSLT passes,
into JATS, for example. The
evolve-hub configuration that was applied to the input was a succession of XSLT modes defined
in ➼ fallback.xpl,
using default parameters/variables/templates/functions in XSLT.
Dynamic Transformation Pipelines
You can skip this and the following two sections if you aren’t interested (yet) in the gory configuration details, content repositories, or debugging. You may jump directly to Improving the Output by Adding Actual Configuration.
All the major steps that transform documents from one XML format to another XML format
are implemented using the
XProc step ➼ tr:dynamic-transformation-pipeline.
It works like this:
-
Consider the
loadoption given to the step (for ex.evolve-hub/driver) -
In the configuration cascade, look for the most specific file with the name
evolve-hub/driver.xpl. This pipeline (or a fallback pipeline, if specified) will then be dynamically executed, using Calabash’scx:evalextension step. -
In the configuration cascade, look for the most specific file with the name
evolve-hub/driver.xsl. This will be supplied to the pipeline on its stylesheet port. Typically a more specific stylesheet (for a journal) will import a stylesheet from a less specific location (for an imprint).
Apart from the primary input (source port) and the stylesheet, the dynamically loaded pipeline
may get its options in a cx:options document and additional inputs on an additional-inputs
port with sequence="true". It will typically contain a sequence of XSLT passes, where each pass will transform
its input in a given XSLT mode, using the same stylesheet. It may apply arbitrary
XProc steps, though.
XSLT has a nice import mechanism; in XProc, import is a different thing. There is
no “inherit&tweak”
mechanism for pipelines. Therefore, in order to avoid the redundancy of writing lots
of fairly similar multi-XSLT-pass
pipelines, tr:dynamic-transformation-pipeline (or rather, ➼ tr:load-cascaded)
supports dynamic generation of the resource in question. So in the example above,
if the dynamic loader is looking for
evolve-hub/driver.xpl at a certain location and doesn’t find it there, it will also use an XSLT pipeline
evolve-hub/driver.xpl.xsl at that location, before it skips the location altogether and searches
less specific locations. It will invoke, by convention, the main template of
evolve-hub/driver.xpl.xsl. This main template typically loads the pipeline
evolve-hub/driver.xpl from a less specific location (or from a sister journal) and transforms
it, typically adding or removing XSLT steps in certain modes.
Configuration Cascade
The configuration relies on the following assumptions:
-
Each content item belongs to a certain place in a content hierarchy (a certain imprint, a certain book series, …).
-
It is possible to address this location by name/value pairs
-
The name/value pairs, if not given explicitly, may be parsed from the file name.

-
All content items within a subtree inherit the same configuration settings (CSS, XSLT, Schematron, …) and may overwrite them for their subtree.
These non-overlapping classification hierarchies are called ➼ clades.

In a transpect project, the configuration overrides for the clades are stored in the
a9s
(adaptations) directory.
The underlying concept is described in greater detail in ➼ another piece of documentation that will eventually be integrated into this site.
It is also possible to have clades for each input type, e.g., .docx and .idml.
However, this approach is problematic as dicussed briefly at the end of
➼ this section.
There are two ways to determine which clade a given input file belongs to:
-
by file name parsing (example:
CSMI_2014_701.docx → publisher=ulsp, journal=CSMI, ms=CSMI_2014_701, ext=docx)(Note that
publisher=ulspdoesn’t come from nowhere; this name/value pair either needs to be returned statically the same for every content by the parser, or it needs to be looked up by the parser in a journal/publisher list.) -
by explicitly setting it as an option to the pipeline (example:
clades="publisher=ulsp journal=CSMI", where ext may still be parsed from the file name). You may use ➼[,/\s]as a sepator
transpect Configuration File (clades file)
At this point, it might be helpful to define “configuration”. It bears dual meaning: In a broad sense, it’s the entirety of customizations, be it XSLT, CSS, fonts, dynamically loaded Proc pipelines, Schematron rules, … In a narrow sense, it is the single configuration file (the transpect configuration file) that declares which clades are available and by which name/value pairs they are selected.
The current project’s ➼ transpect configuration
file contains three clades: one for the publisher,
ulsp, and two for the journals CSMI and Test.
The ultimate goal of clade selection is to compute file system paths in descending
specificity where to look for
the broad-sense configuration files. The file system paths will be contained in a
➼ c:param-set
document that is the result of invoking ➼ paths.xpl with
a file option and optionally a clades option, where the name/value pairs in
clades will have precedence. Technically the name/value pairs are modeled as attributes
(not
bound to any element).
There is a ➼ Relax NG schema for the transpect configuration file. ➼ Schematron rules in this schema support you in avoiding ambiguous clades that match the same combination of name/value pairs.
Per-clade parameters
You can insert ➼ arbitrary name/value pairs in the clades. These will be included in the generated paths document for a content item that belongs to the clade. By using these parameters, you can for example specify that for a given clade, EPUB2 files should be generated instead of the global EPUB3 setting. This won’t happen automagically though. A pipeline step has to read the parameter from the paths document and alter the value in the EPUB configuration document template.
Custom File Name Parser
Matching a clade according to the parsed or supplied name/value pairs is one thing.
If you don’t supply the
clades option, it is necessary nonetheless to parse the input file name in order to get
the
name/value pairs in first place. Parsing the file name typically involves xsl:analyze-string
and creating attributes from the results. There is a ➼ default parser that will be
imported by a project-specific parser that ➼ overrides its
tr:parse-file-name()
function. Supplying this overriding parser is an essential customizing task. The location
of this
custom paths.xsl is given in the ➼ /tr:conf/@paths-xsl-uri
of the transpect configuration file.
It is instructive to have a look at the ➼ changes of commit e5e4e45 and also at the ➼ resulting paths document.
Have a look at the c:params that start with “s9y…” (for “specificity”).
s9y1-path is the path to the most specific confiuration location. There are 9 levels of
specificity available at the moment, that means 7 levels of nested clades, plus the
path for the common configuration,
plus the content location for per-work specific overrides.
If no clade matches, there will only be two search paths in the paths document: the directory where the input file resides in and the common path.
If the project doesn’t rely on cascaded configuration, most macroscopic steps such
as
evolve-hub support custom, static URIs for fallback-xsl and
fallback-xpl, and they also provide useful default values for these options. So in principle,
instead of the cascaded loading, we can supply the pipeline of ➼ commit 0e289b5 with more appropriate XSLT and inner XProc pipelines and be done with it. However,
especially book production teaches us that there will always be exceptions. The way
we dealt with exceptions before
transpect was either to produce non-standard titles outside of the standard workflow
or to add case switches to the
conversion code that will ultimately render a monolithic converter unmaintainable.
Content Repository
You might have noticed that in the paths document that ➼ repo-href-local and also s9y1-path point to HTTP URLs, although they
should be pointing to local paths. This is the canonical content repo location URI
that will be resolved by the
catalog resolver. We didn’t supply a local rewriteURI resolution for this yet. Because the content
files’ location on a local drive may be different for each user, it is not advisable
to provide a fixed catalog for
all of them in the revision control repository. Although there is a <nextCatalog
catalog="content-repo.catalog.xml"/> provision already in the XML catalog for this resolution, you
should only provide an unversioned file for each installation of this project.
However, a common location for the (local copy of the) content repository is next
to the project’s code directory.
We typically cover this common case by placing another <nextCatalog instruction below the
first (see ➼ diff of
the catalogs). The paths that are supposed to be local
➼ become local in the paths document.
By providing a content-repo.catalog.xml that has higher nextCatalog precedence
than content-repo.default.catalog.xml, you can still divert content repo lookups to other locations.
As mentioned before, local resolution of the content repo will not only be used for
per-content-item configuration
overrides, but also for locating images. When Word InDesign link to external files,
we often strip their paths and later
replace them with concat($s9y1-path, 'images/', @fileref).
Debugging
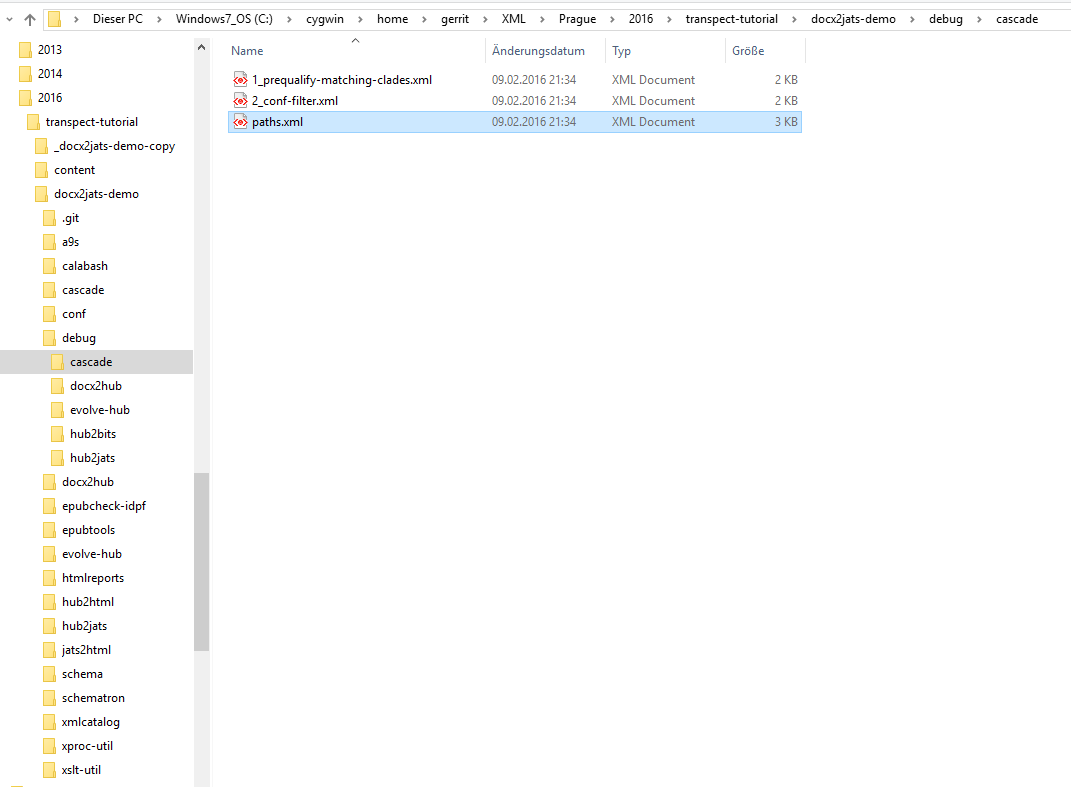
You might have wondered where we read the ➼ paths
document in the previous section, as the pipeline has no output port
for it. We read it from the file debug/cascade/paths.xml. The location of the debugging files
and whether they will be written at all (they can easily comprise dozens of Megabytes
for IDML conversions)
can be controlled as follows:
Almost every transpect step supports two options, debug and debug-dir-uri.
A transpect pipeline run might consist of dozens of steps (primarily XSLT passes)
and these transformations are hard
to debug if they are a black box. We never really figured out how to use p:log, so we wrote our own
➼ tr:store-debug step. debug expects the somewhat XSLT-ish yes|no
option, while debug-dir-uri expects a file: URL (note that catalog resolution will not apply to
this URL). For the docx2jats.xpl pipeline, debug is set to
yes by default, but debug-dir-uri is set to debug, which leads to the
debugging output being written to xproc-util/store-debug/xpl/debug. If you want to store it below
the project directory, you can do so by modifying the invocation to:
calabash/calabash.sh -o result=out.xml a9s/common/xpl/docx2jats.xpl \
  file=../content/ulsp/CSMI/CSMI_2014_701/docx/CSMI_2014_701.docx \
  debug-dir-uri=file:$(pwd)/debug
for Linux or debug-dir-uri=file:/$(cygpath -ma debug) for Cygwin.
The resulting tree looks like this. There are debug subdirectories for almost every step.
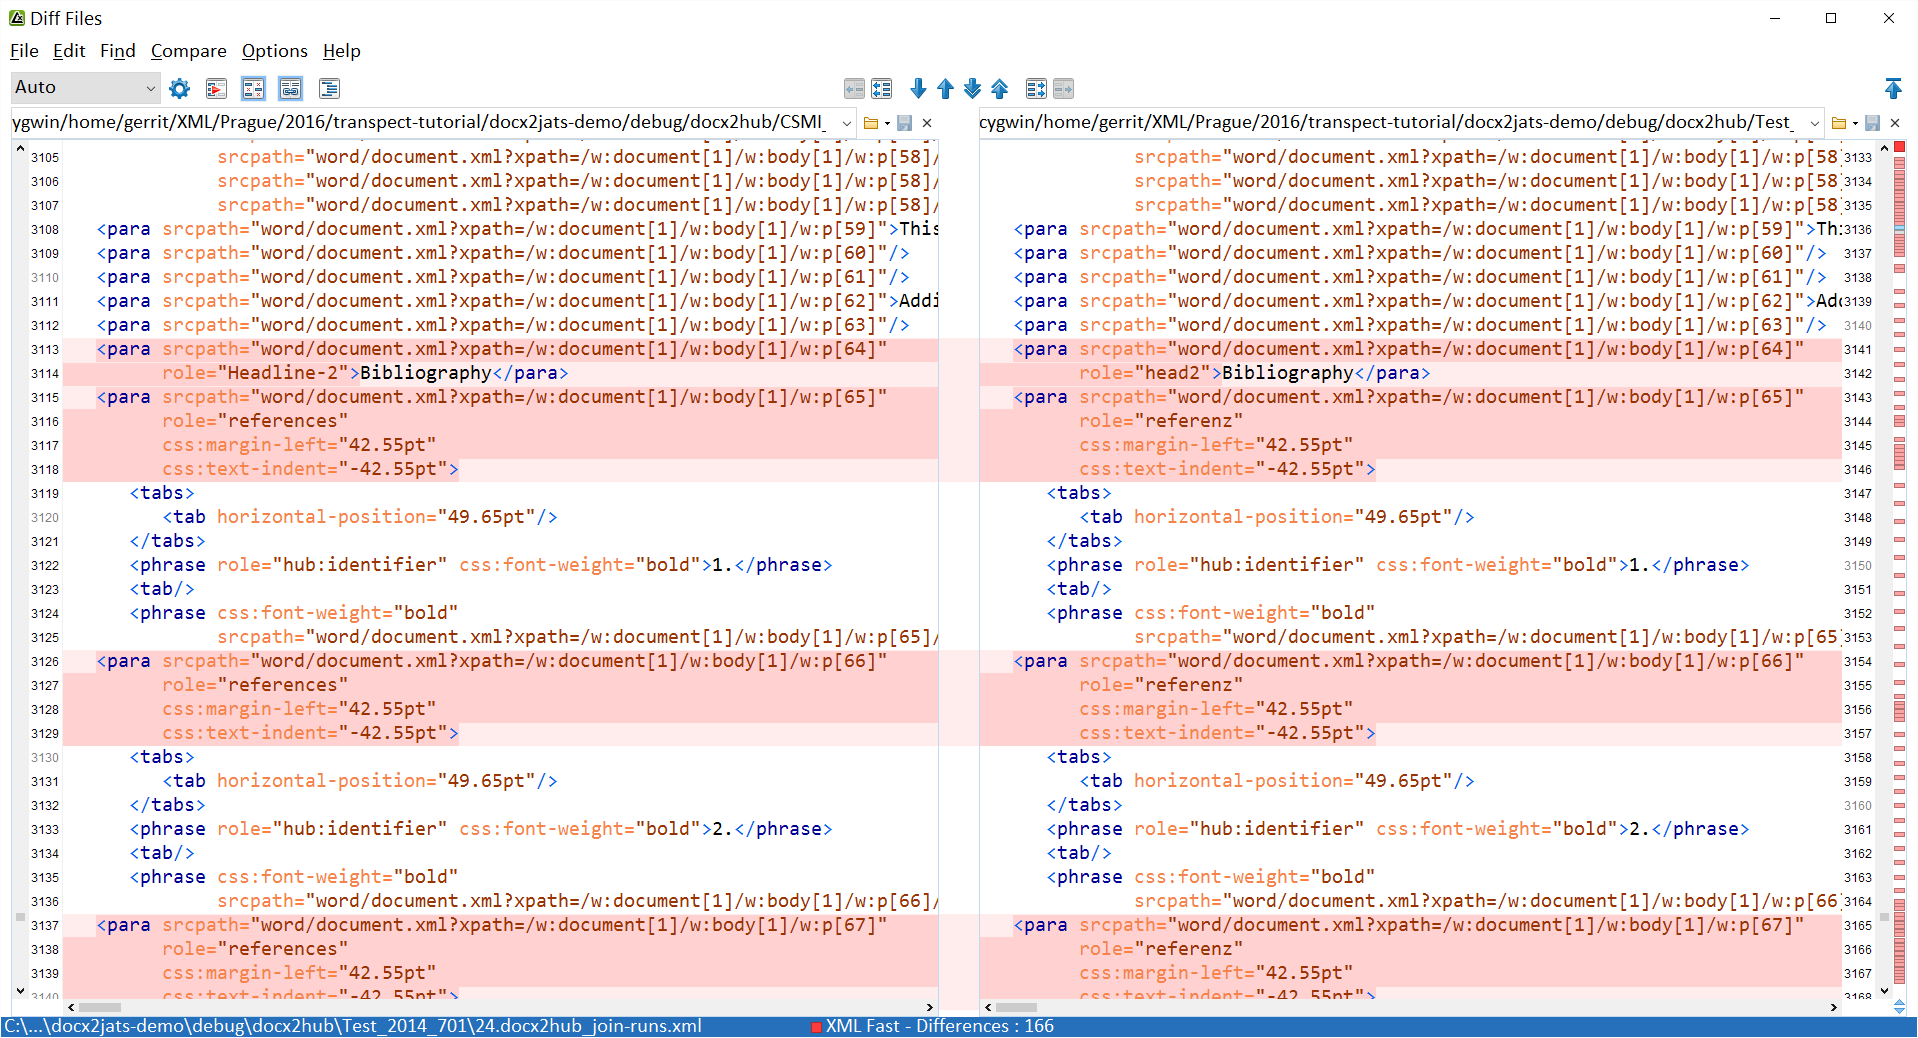
Improving the Output by Adding Actual Configuration
In order to make the output
more valid and reasonable, we now add configuration for the evolve-hub
and hub2jats steps. (As a side note: docx2hub is a virtually configuration-free step that
is supposed to yield the same flat Hub XML output for a given .docx file.)
The differences in code can be seen ➼ here (commit 34147ac). Admittedly, finding the right places to tweak the ➼ imported XSLT may be hard, but that’s a thing that this sample project should help alleviate.
Validation
This ➼ diff of commit e5ef56c show several modifications to the ➼ current pipeline:
-
Added a
jats2htmlstep, ➼ XSLT customizing for this step, and CSS -
Added Schematron checks for flat Hub, for evolved Hub, and for JATS XML
-
Added a Relax NG check for JATS XML, using the JATS 1.0 archiving schema (using a ➼ wrapper around
p:validate-with-relax-ngthat produces an output port and reports the XPath location for each error, in addition to the line number which is meaningless in the middle of a pipeline) -
Added a
tr:check-stylesstep that matches the styles found in the input.docxagainst ➼ this list (that has been extracted from the Hub XML of a sample input document) -
tr:patch-svrl: Collect thereportports of all steps (SVRL andc:errorsdocuments produced by the RNG validation and potentially also byp:try/p:catch-encapsulated steps) and patch them into the HTML rendering, at the error location. There is an XML Amsterdam presentation entitled ➼ “Unified Validation Reporting in HTML Renderings” that describes this approach.
The modified invocation (modulo debug options) reads:
calabash/calabash.sh \
   -o result=out.xml \
   -o htmlreport=report.xhtml \
   a9s/common/xpl/docx2jats.xpl \
   file=../content/ulsp/CSMI/CSMI_2014_701/docx/CSMI_2014_701.docx
See the resulting error report.
Faulty Input
Let’s convert a file, ➼ CSMI_2014_701f.docx, that contains some errors.
After setting a ➼ configuration parameter that will regroup the SVRL messages according to ➼ category instead of conversion step, where category is supplied by the Schematron author, the HTML report contains some more errors and warnings.
Using the Configuration Cascade
So far, we did only supply customizations in the a9s/common directory. Let’s introduce
a new ulsp journal, alongside the existing CSMI, and call it 'Test'. (Oh, we did actually
introduce it already,
in our ➼ configuration
file.) Its configuration base directory is a9s/ulsp/Test.
Mapping Style Names
Sometimes you want to use localized or publisher-/journal-/typesetter-specific versions of your Word or InDesign templates. transpect features a batch-mode style mapper that will normalize the diverse names to a common standard. This will help you keep your XSLT and Schematron rules simple.
Let’s assume that the Test journal uses different style names, like this:
We introduce a file ➼ a9s/ulsp/styles/map-docx.xhtml.
It contains a 3-column HTML table where the second column contains a regex that is
supposed to match existing
style names and the first column contains the replacement. The replacements will be
applied from top to bottom;
subsequent rules will be applied to the output of the current replacement rule. This
makes the mapping mechanism
really powerful.
We add ➼ map-style-names as a submodule,
refer to its XML catalog and ➼ invoke
the step in the pipeline, right after docx2hub. That way, we don’t have to adapt
our style checking step or any other parts of the pipeline.
Without the mapping, the HTML report will go berserk because no valid JATS could be produced, due to the unexpected style names.
Extending the Schematron
In order to make it a bit more interesting, we introduce ➼ an
additional Schematron check for a9s/ulsp/Test. The resulting report features an
interesting new error.
The assembly mechanism for Schematron checks works cumulatively. For each given family
(jats, flat, evolve-hub in this project), it adds the checks
of the sub-clades to the ancestor clades’ checks.
If a check should be left out in the derivative clade, its pattern should be redefined empty there.
Creating an EPUB
transpect’s EPUB conversion step accepts a single (X)HTML document on its source port. In addition, it requires a configuration file in which you can specify the EPUB version (2 or 3 currently), the hierarchization classes/epub:types for generating the nav document, parameters for existing checks (e.g., image file size, colorspace), additional Schematron for checks, the location of the cover image, and metadata.
We’ll have to change the following things:
-
add an
xml:baseattribute to the HTML rendering that is afile:URI that ends in.xhtml. In the example, it is the file URI of thedocx2huboutput, with a trailing.hub.xmlreplaced with.xhtml -
add css-tools as submodule since we forgot to add it initially
-
provide an epub configuration (we put it into
a9s/common/epubtools/epub-config.xml, andtr:load-cascadedlets you load a different config files for other clades or create a document from another one using theepub-config.xml.xslmechanism).
These are the changes of the corresponding ➼ commit 9e5e49b.
This is the resulting EPUB file, and this is the HTML report that includes the standard IDPF epubcheck 4.0.1 checks. In addition, it would have also checked image color spaces and sizes by Schematron. But in this case the images happen to be TIFFs – we need to ➼ convert them to supported formats before.
PubMed Central Submission
PubMed Central / NLM style checker
PMC provides ➼ XSLT stylesheets for letting you check JATS prior to submission. We wrapped this as an XProc step that produces SVRL that may then be rendered into the HTML report.
Here’s the corresponding ➼ commit 0327abf
Creating a PMC Zip
tbd; will be available by tonight…
transpectdoc
The generated documentation of this project.
Integration/Tests
tbd: Upload interface / Makefile
tbd: before/after
tbd: jenkins screenshot
GUI
tbd: screenshots, installation of this project on ➼ transpect.le-tex.de